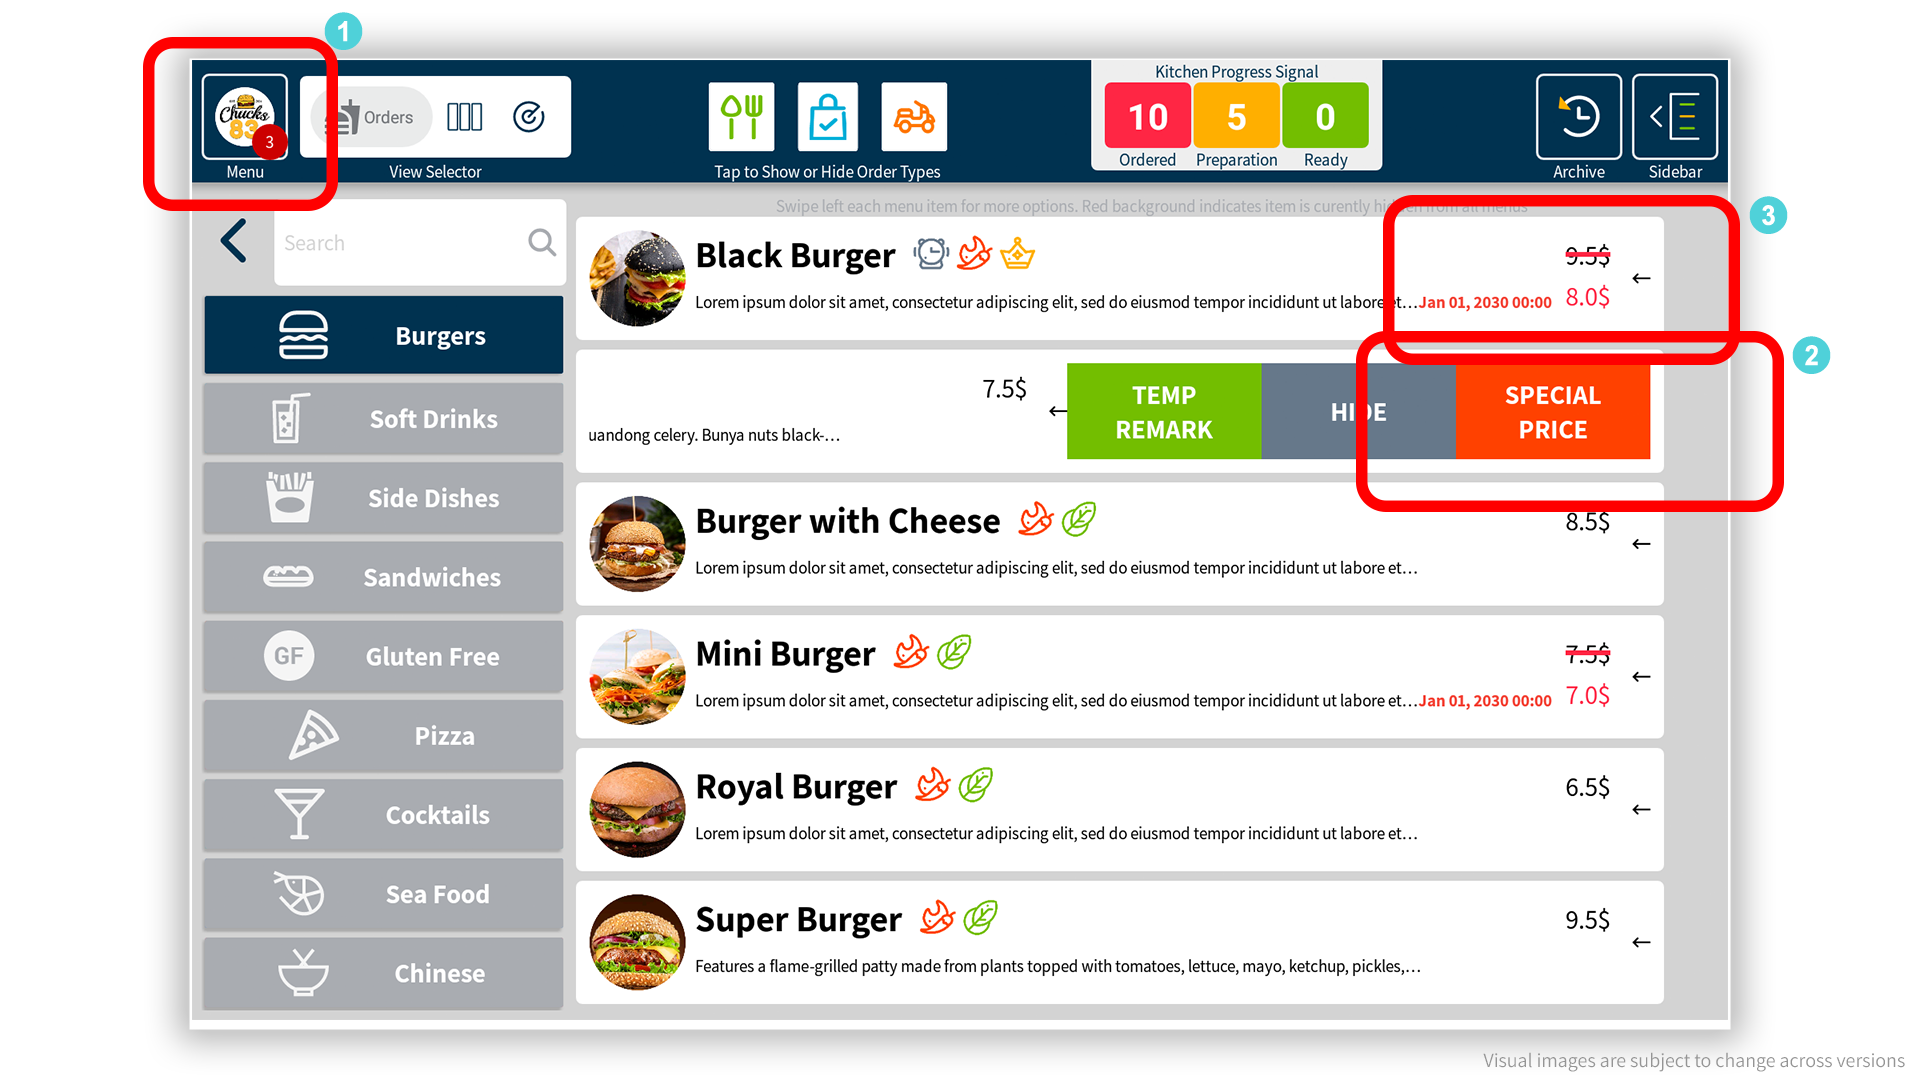
Kitchen can execute an immediate / temprorary price update.
Useful sample: Special sale; Promote item; Cut price for a must sell item.
Item price can also be managed in Admin > Items
Client app updates immediately and recognizably
Do this: Kitchen App > top left, business menu icon > select item > swipe right > tap on Special Price. In popup set the new price and limit the expiration date
Note: Requires Admin Password – only authorized kitchen workers can execute this feature
Add a Temporary Kitchen Note
A temporary note added to item description. Useful sample: An item ingredient has been changed or missing
Client app updates immediately and recognizably
Do this: Top left, business menu icon > select item > swipe right > tap on Note. In popup set the remark and limit the expiration date
Note: Requires Admin Password – only authorized kitchen workers can execute this feature
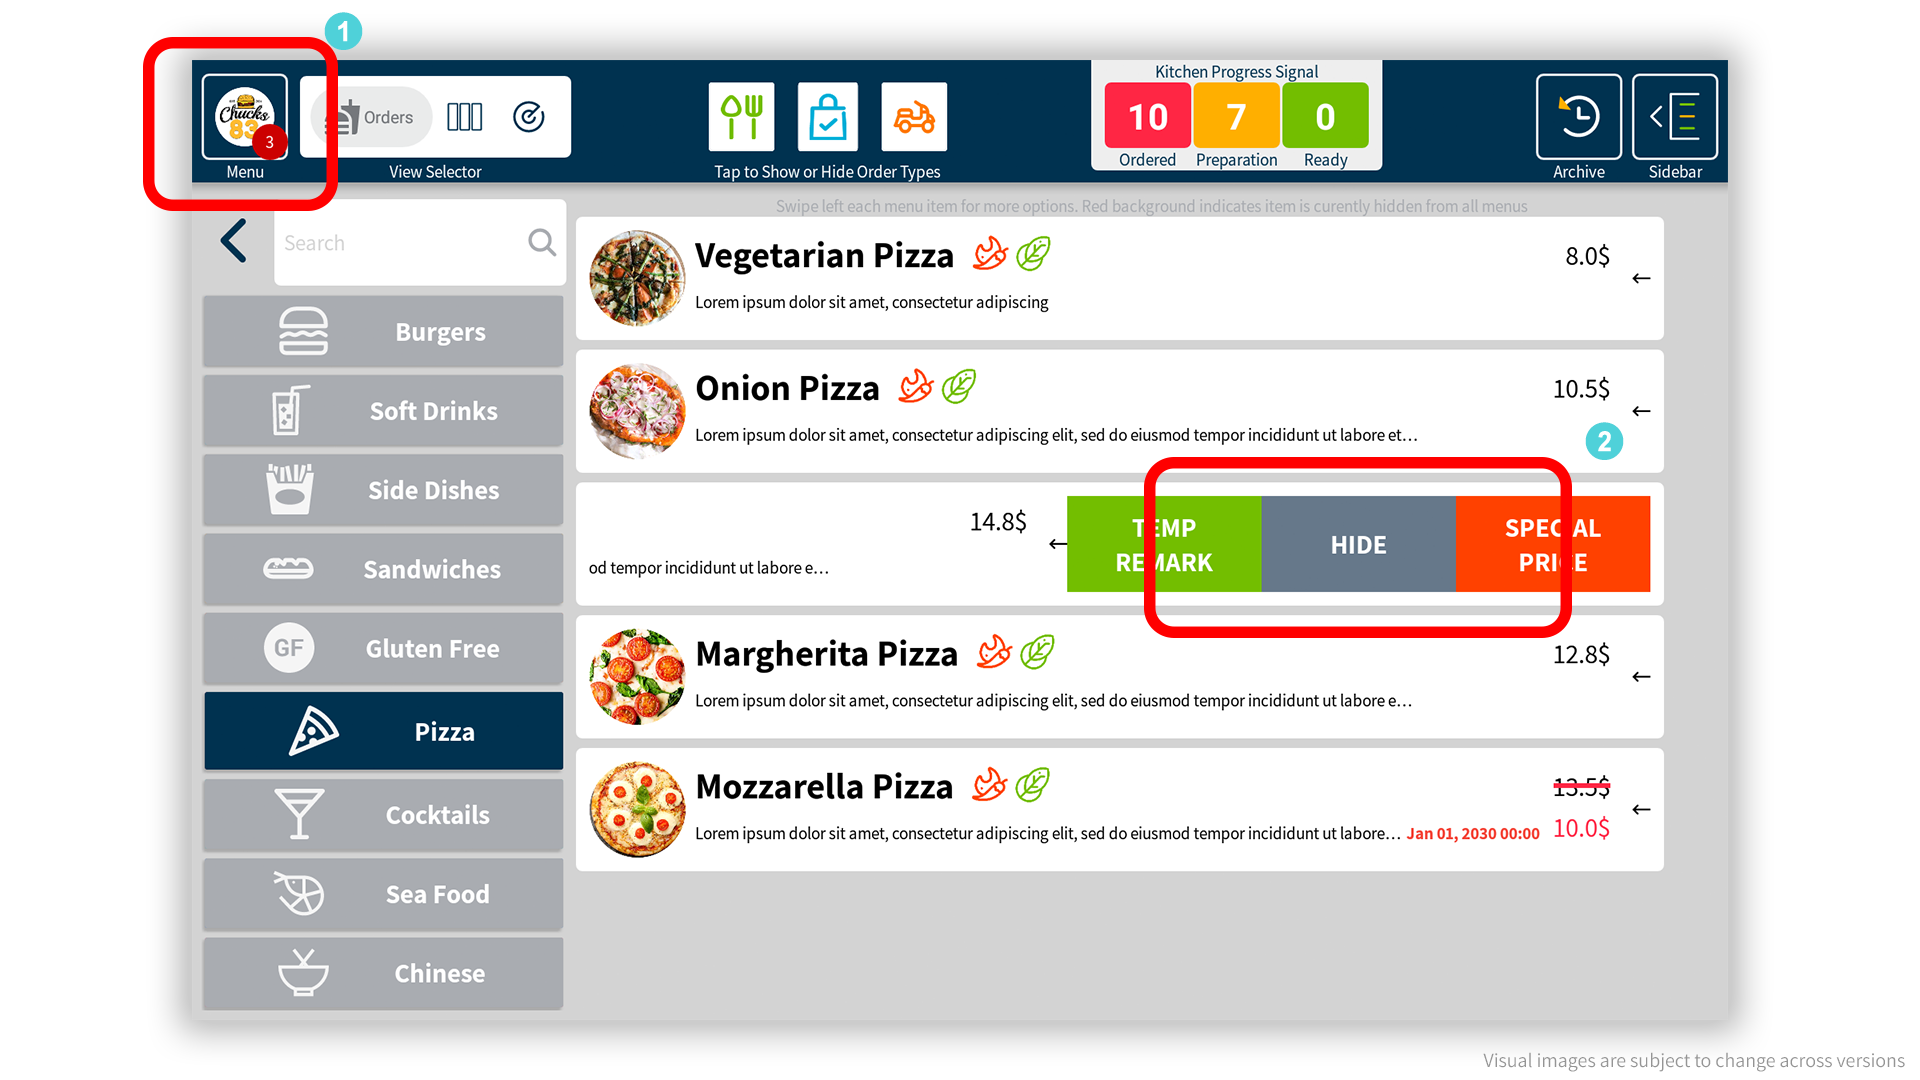
Hide temporarily an item from sale
Temporary removal of an item from the menu. Useful sample: An item is not available for sale for any reason.
Do this: Top left, business menu icon > select item > swipe right > tap on Hide.
Note: Requires Admin Password – only authorized kitchen workers can execute this feature
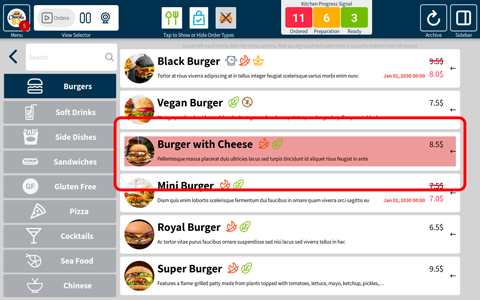
Hidden Item signs
Notifications to visualize the currently hidden items.
The notification icon in the business menu icon will show the number of items currently hidden.
A red background will indicate a hidden item
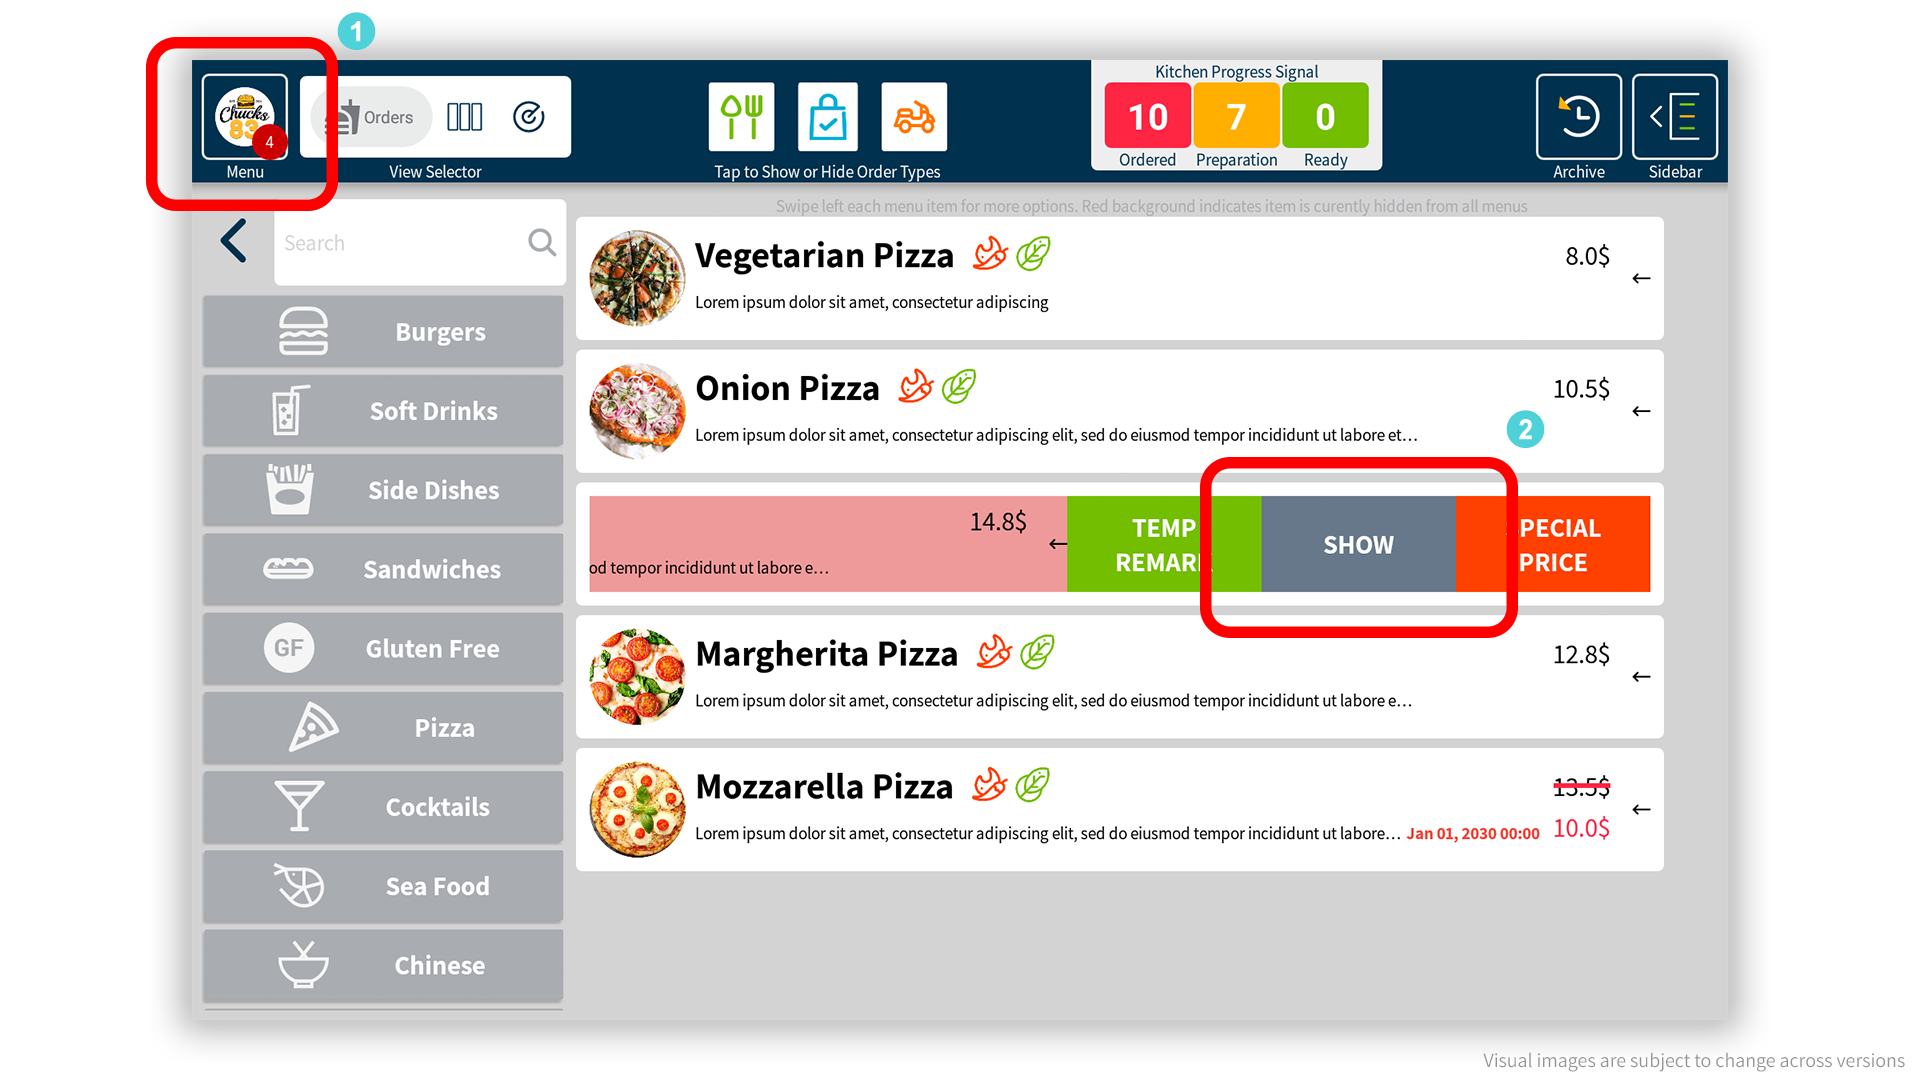
Show Items (after hidden)
Return a hidden item to menu
Item is immediately shown back in client menu
Do this: Top left, business menu icon > select item > swipe right > tap on Show.
Note: No password required for this action
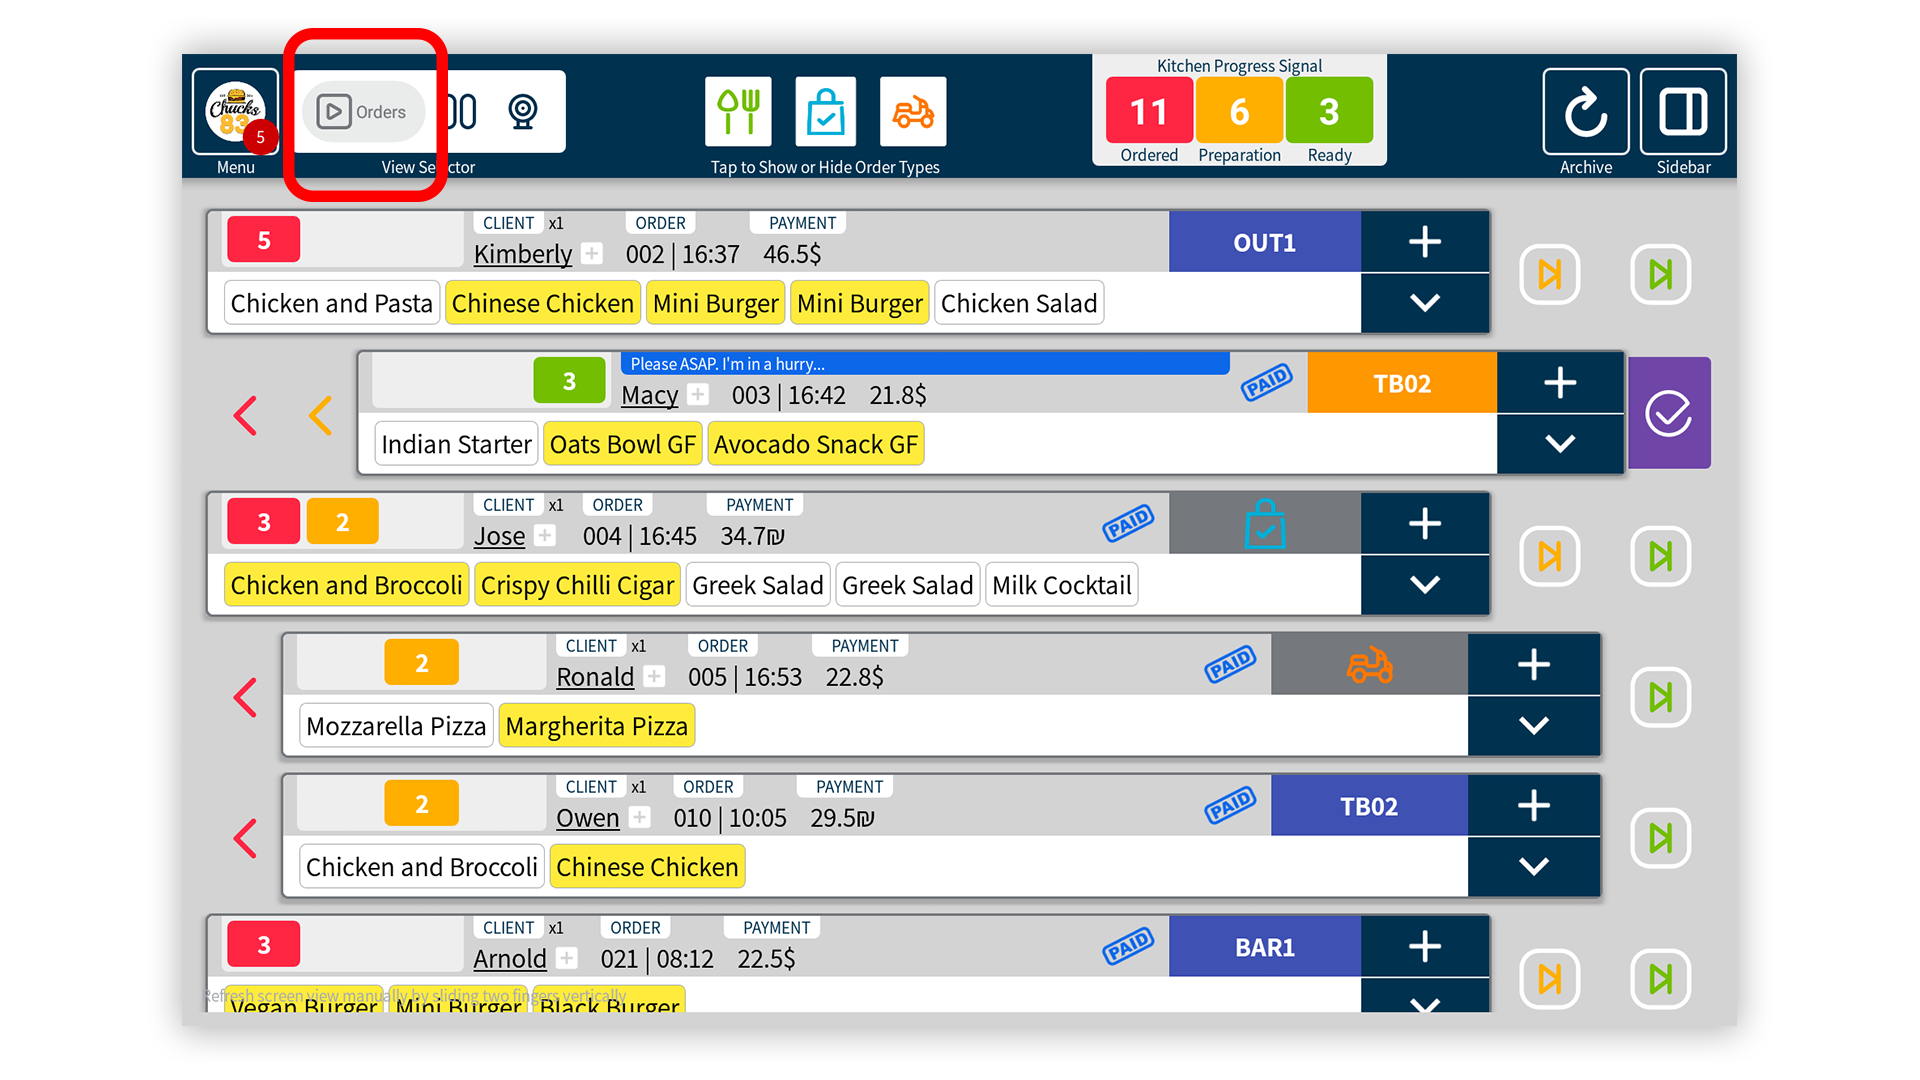
The View Selector
With the View Selector you can switch between the different modes to have a better control on the service orders and preparations
View Selector > Orders View
The Orders View mode enables to view all current order palettes and to promote the whole order from “Ordered” (red) to “Preparation” (orange) and finally to “Ready” (green).
When the palette is in the “Ready” state, a purple button will appear. Tap it to shift this order to today’s archive (means this order has been completely delivered to the client)
In this view, all the order items are progressed to the next stage as a whole unit.
The client app is updated accordingly.
Do this: Set the selector to “Orders”
Note: Backward is also possible.
View Selector > Items View
The Items View mode is a Drag & Drop feature enabling to shift an item from the left column (“Ordered”), to the middle column (“Preparation”), and to the right column (“Ready”). When the item is in the right column the waiter is notified.
Learn more about waiter “Bonnes”.
This view is Terminal (Kitchen Stations) based, which means that each terminal will see only its’ related items as the admin linked them. E.g. The “Grill” terminal will see only the ordered burgers, whereas the “Bar” only the ordered cocktails
Do this: Set the selector to “Items” (middle position)
Note: 1. Tap on any item for more details. 2. Items with yellow background indicate these items the client asked for an option / extra / special request for them
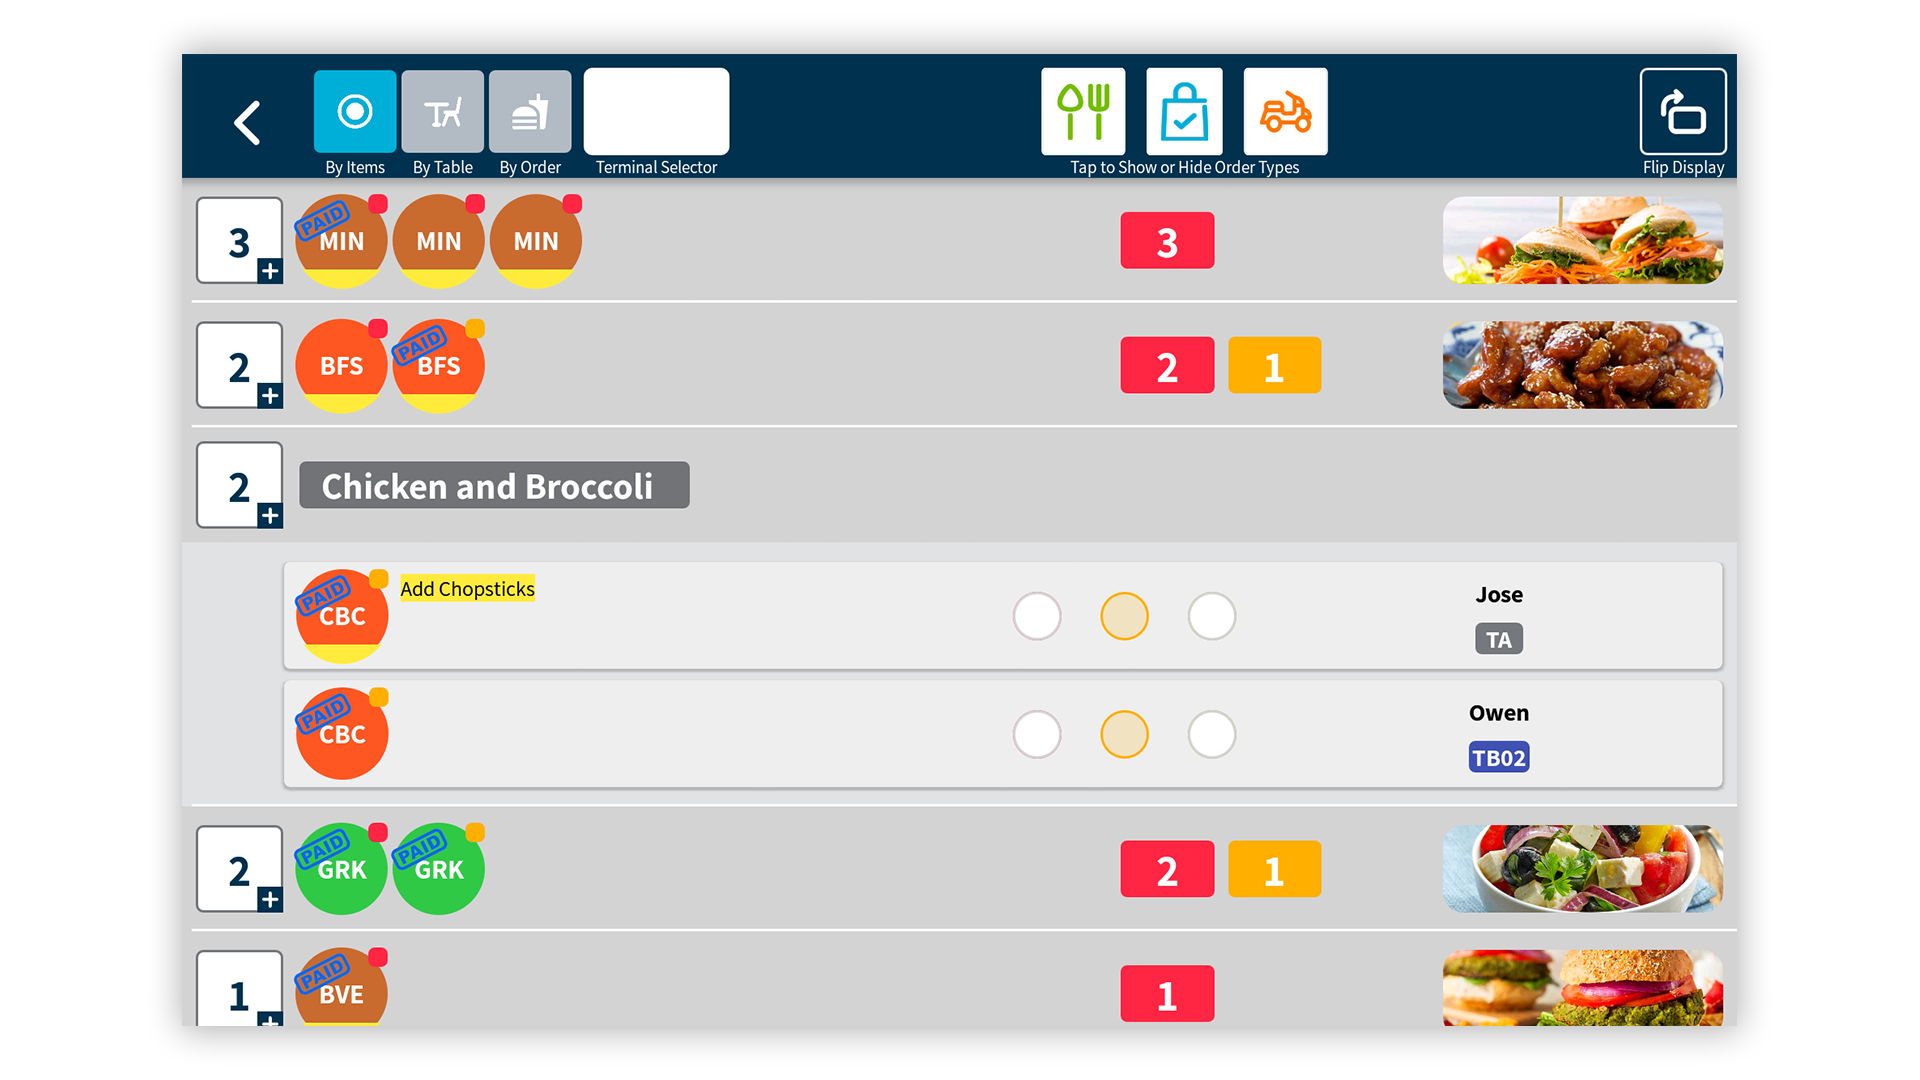
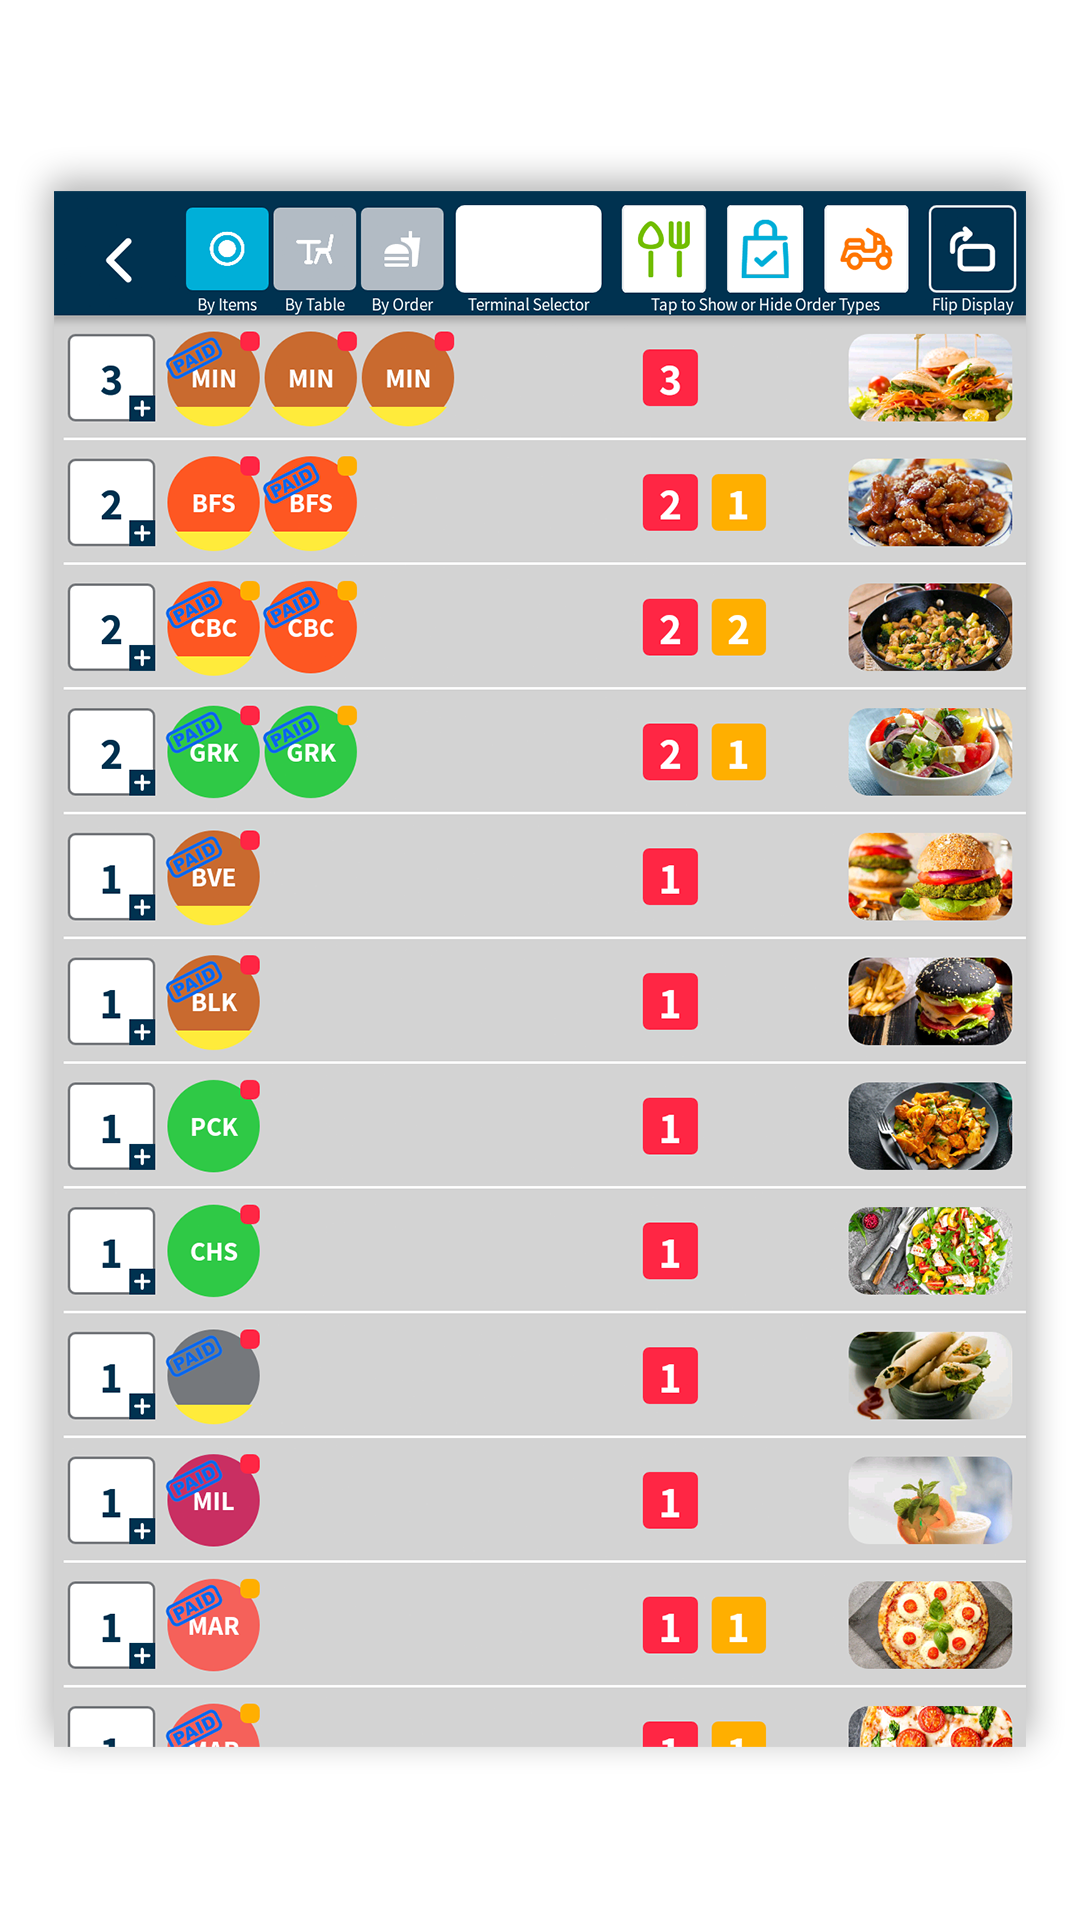
View Selector > Radar View
The Radar View enables you to better control your service and precise preparation. Select “By Items” if you prepare a line of the same items, select “By Table” if you what to ensure for example the order of the dishes served (First, then Main Course etc.), or select “By Order” to ensure the stage of all items in each order
In this view multi changes are possible – then confirm with the green check button that slides from the right side.
Learn more about the item 3-code and Terminal colors
Do this: Set the selector to “Radar” (right position)
Note: This mode also supports the Portrait position
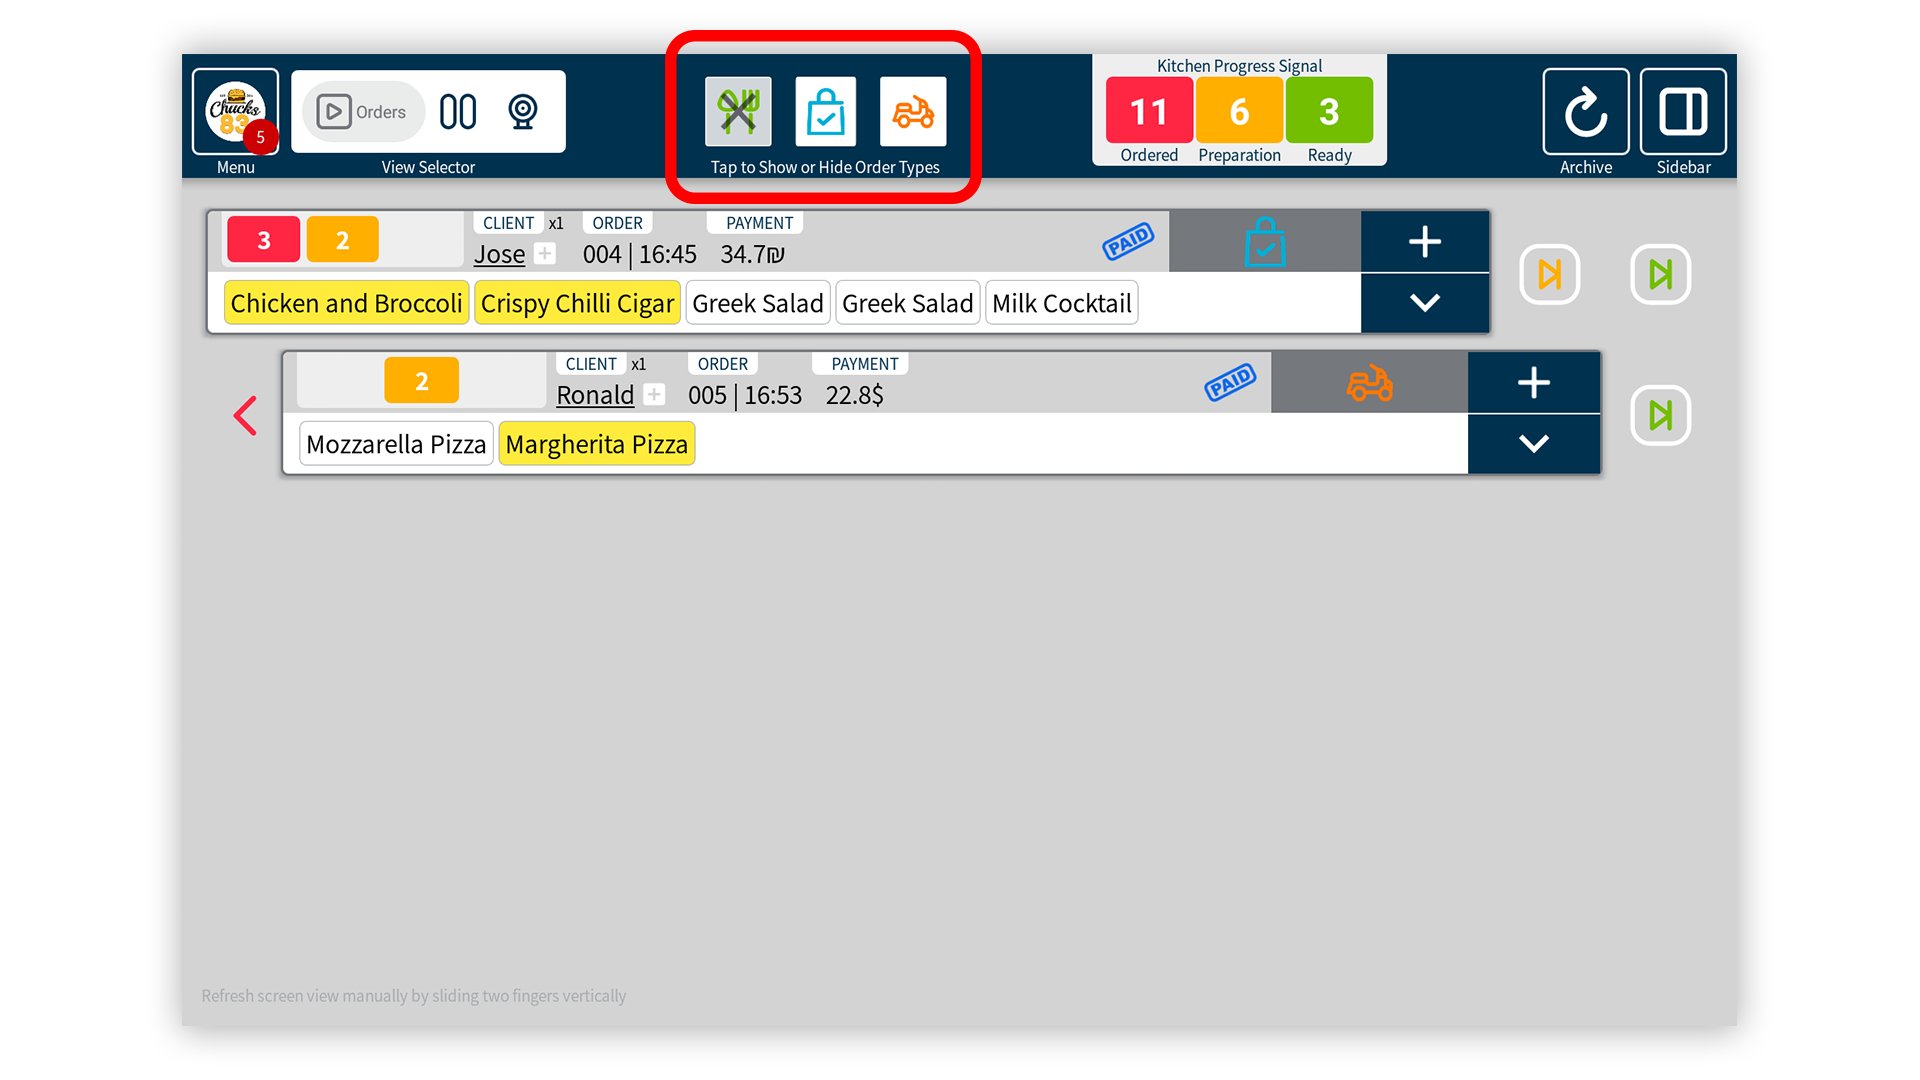
The Order Types Filter
Filter Eatin / Take-Away / Delivery orders
Display on the mainboard only the desired type of orders needed to view.
This filter is available in all 3 view modes of the mainboard
Do this: Tap on the “Eatin” icon to hide all these types of orders. Tap on “TA” or “Delivery” icons to hide these types.
The Progress Signal
See at a glance the sum of all items in all preparation stages
When any order is promoted to the next stage, this indicator will be automatically updated with all current items
The Order Palette
With the order palette you get all the information about this order as well as preforming essential tasks
When any order is promoted to the next stage, this indicator will be automatically updated with all current items
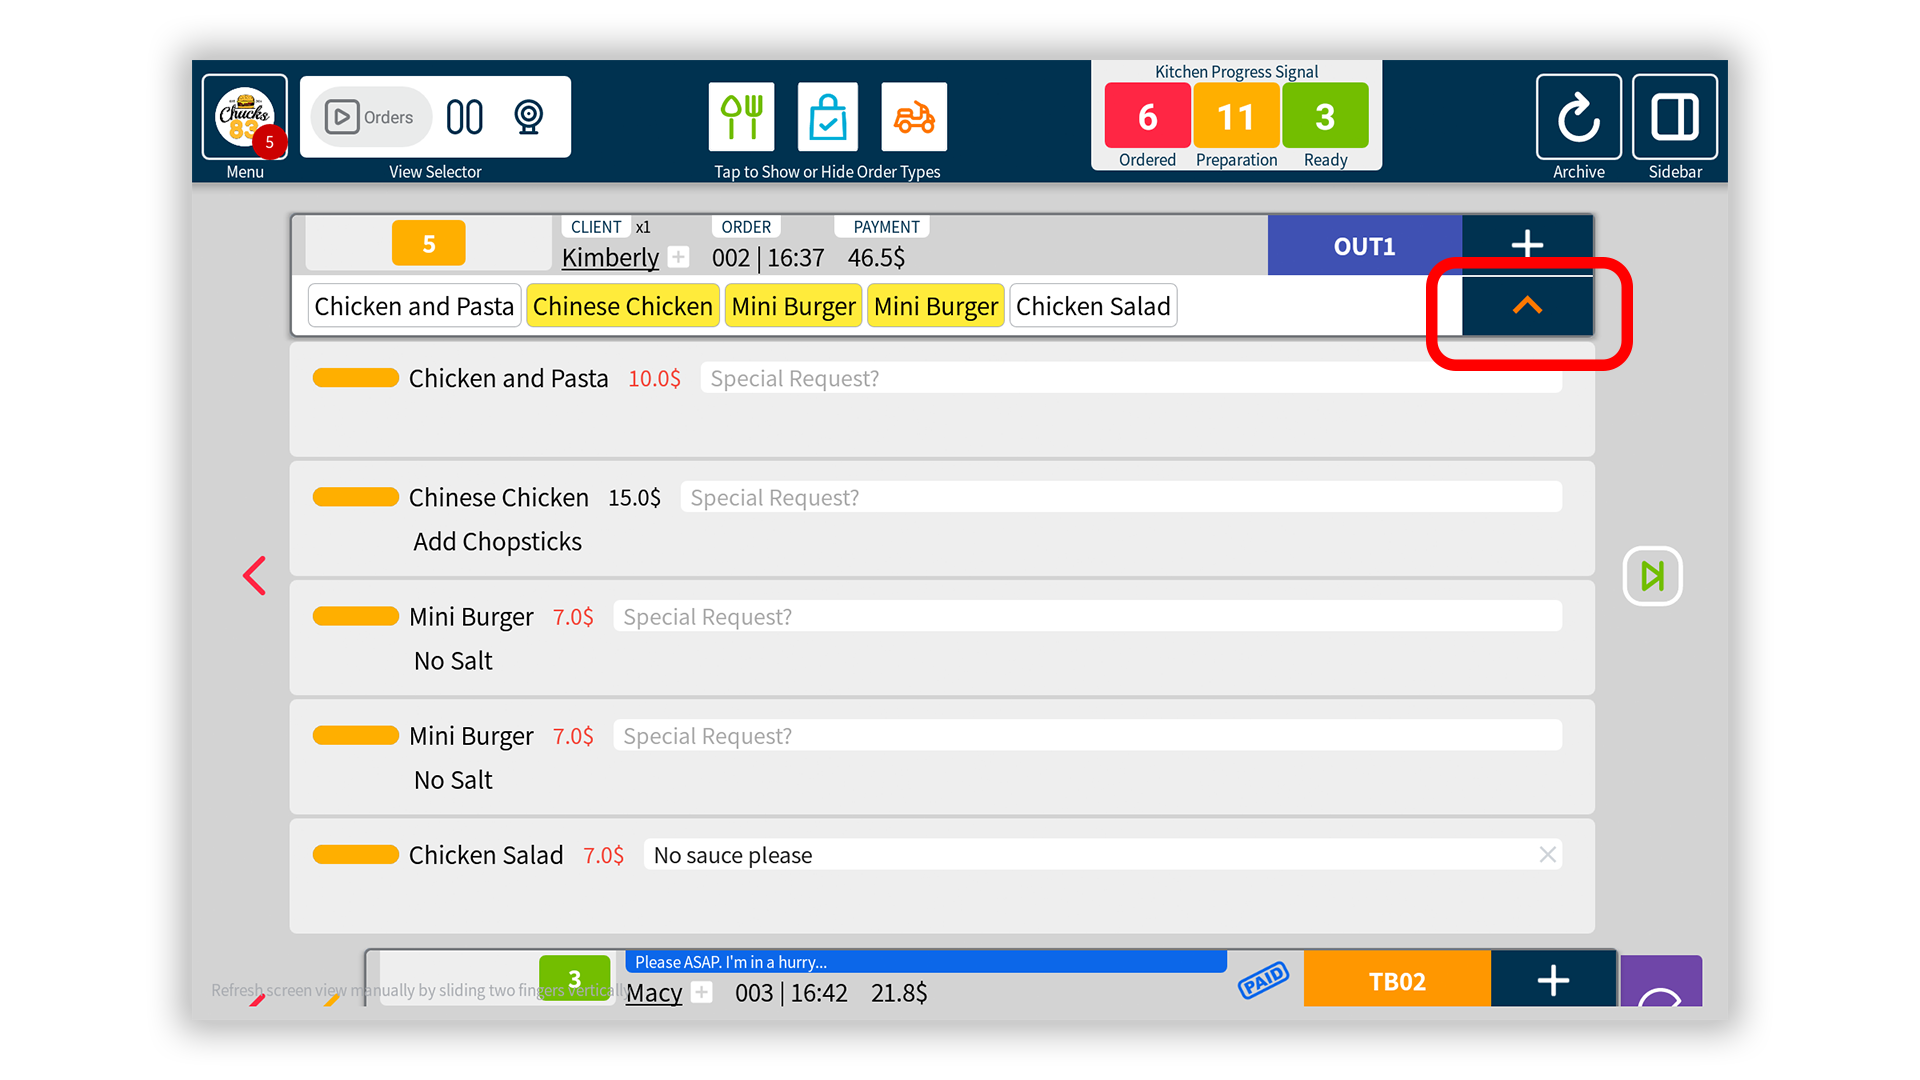
The Order Palette > Show Items Details
Inspect the orders’ items: the preparation state, the options requested and or add a remark
Do this: Tap the “Down Arrow” on the right side of the palette
Note: The arrow icon will toggle: tap again to close the drawer
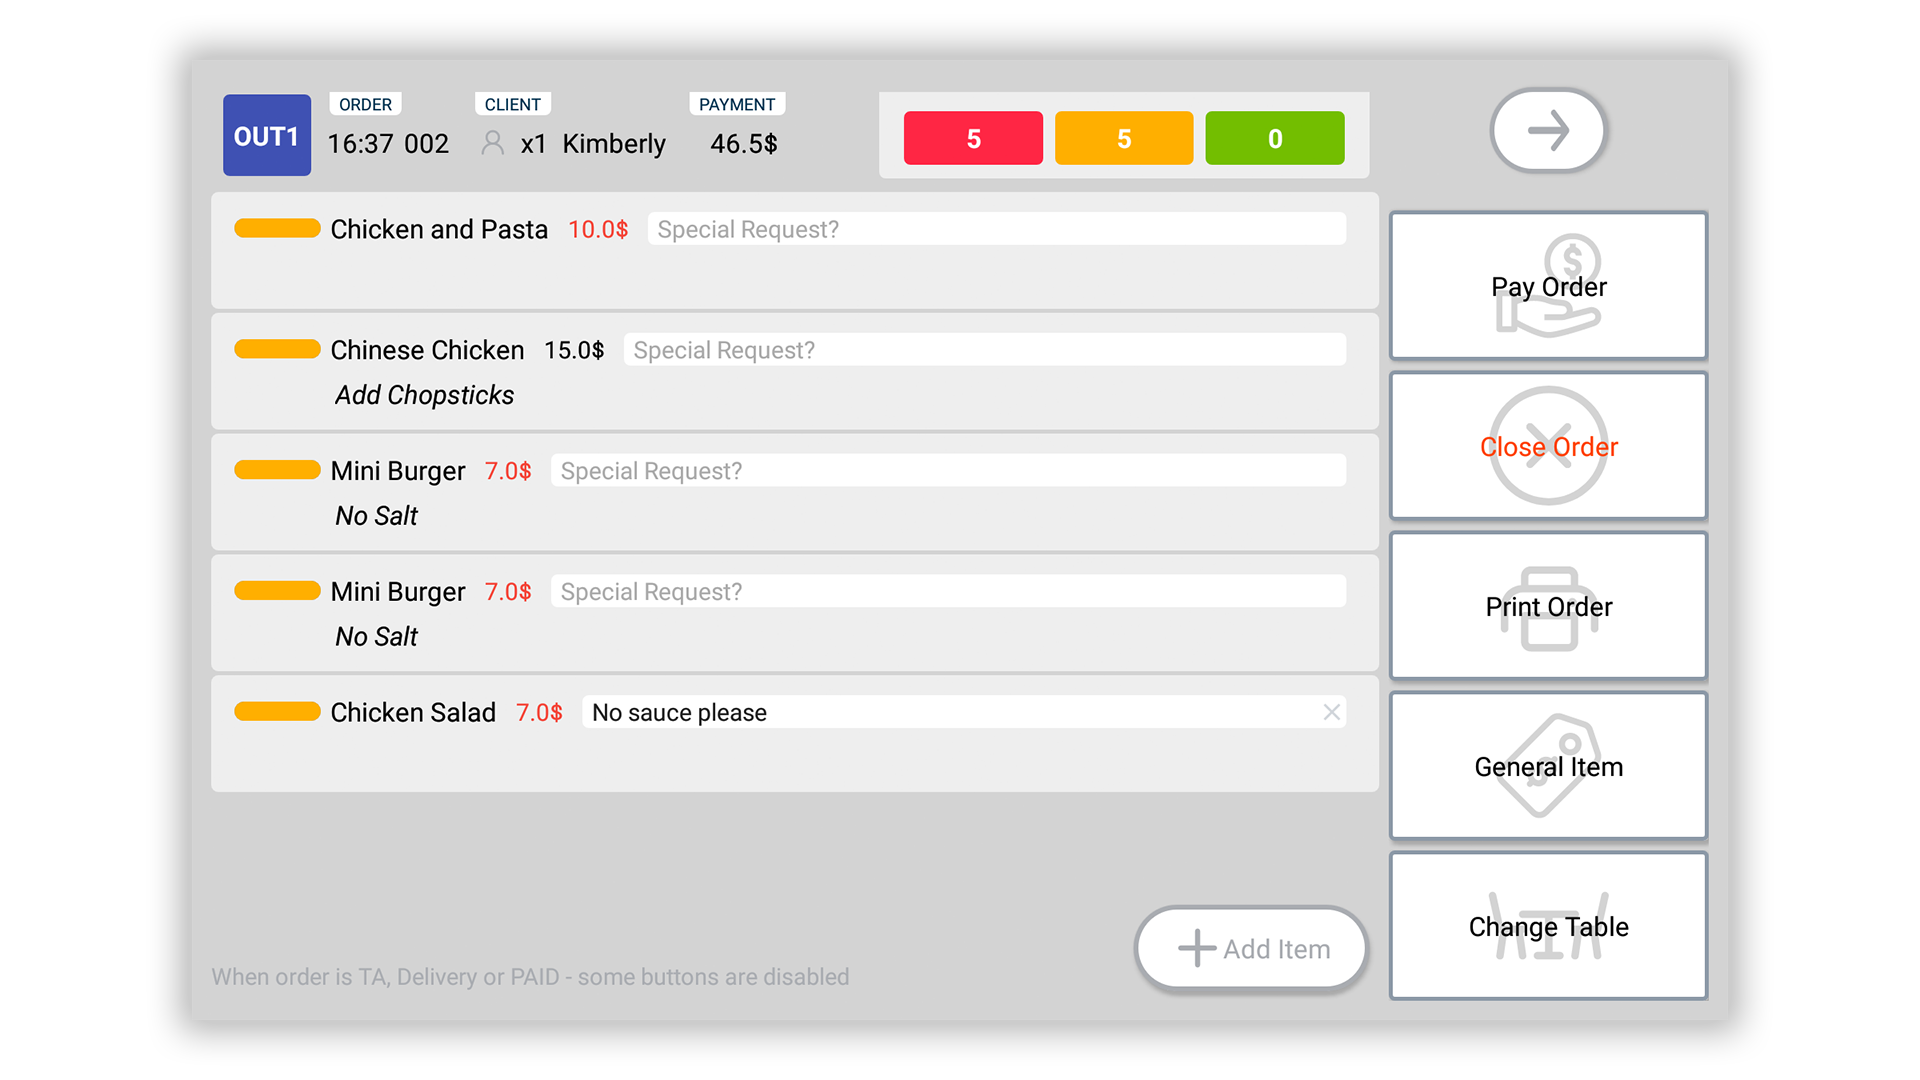
The Order Palette > Show Order Details
All orders’ information details and special tasks to perform (add an item, change table, pay for order, etc.) on one page
Do this: Tap the “Plus Sign” on the right side of the palette
The Order Palette > Overview
Learn to easily get the most information for every order
