It is time to explore a new management and service platform for your dining business.
DreamDiner Prep ("Preparation")-App
Any listed Staff Member can enter the application to perform advanced order management tasks
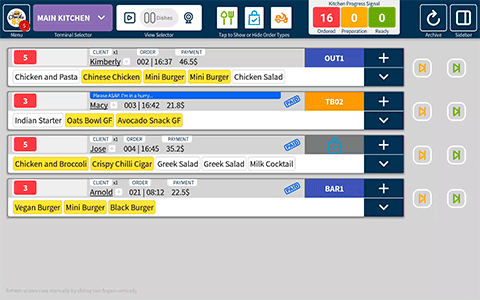
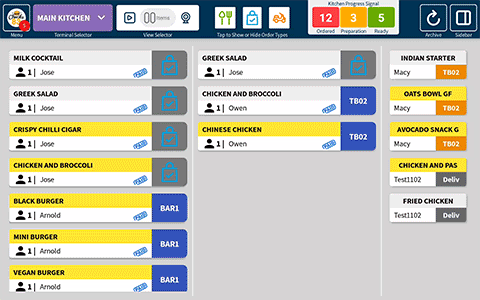
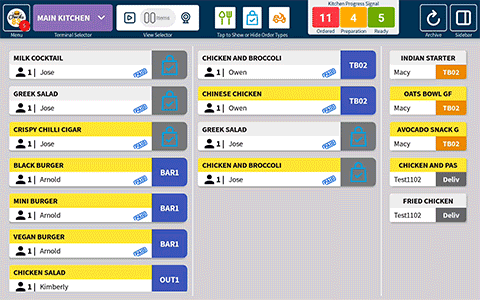
The Kitchen App is where all your client orders are loaded and displayed. The Mainboard display can show all items and orders under the “Main Kitchen” terminal – or just the related items linked to a custom terminal you have entered – such as “Grill”, “Salad Preparations”, etc. Place a Kitchen App in every kitchen terminal, and set the display selector accordingly. Your ordered items are now displayed just where they are meant to be prepared in your kitchen: an ordered cocktail will then show only in the app terminal set to “Bar” – and the Home Burger in the “Grill” terminal, etc. Drag & drop or click on any item or order palette to shift it ahead – from the “Ordered” state to “In preparation”, then “Ready” – and finally “Delivered”. Conducting a neat and accurate preparation process is the worthwhile goal of this app. Your assigned kitchen staff members can log in and enjoy an efficient preparation work experience!
Here is a quick flow of how to set up and get the most out of the DPA app
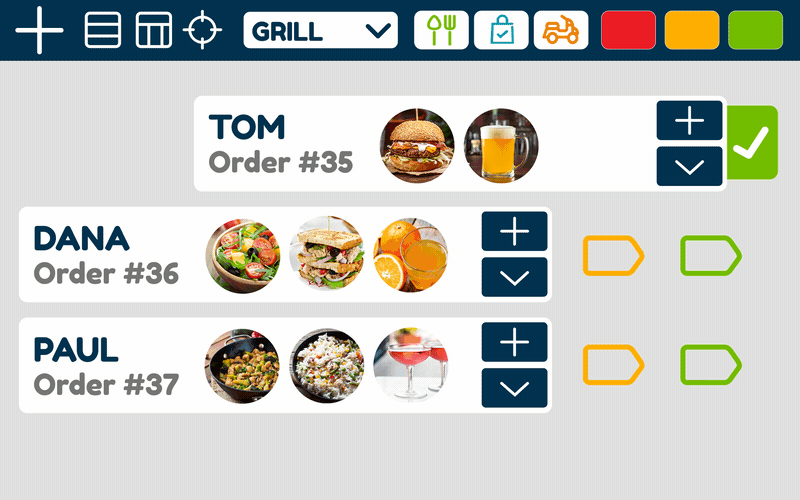
Promote preparation > by order
In the Orders View mode, you can see all current order palettes. You can move the order from "Ordered" (red) to "Preparation" (orange), and then to "Ready" (green). When the palette is in the "Ready" state, a purple button will appear. Tap it to move the order to today's archive, which means the order has been completely delivered to the client.
Mainboard > Tap the forward/backward arrows
In this view, all the order items are progressed to the next stage as a whole unit. The client app is updated accordingly.
Note: Backward is also possible.
Promote preparation > by items
In Items View mode, choose the appropriate preparation station ("Terminal") to display only the assigned items for efficient control (e.g., only drinks in the "Bar" station and only burgers in the "Grill" station).
In Items View mode, you can use the drag-and-drop feature to move an item from the left column ("Ordered") to the middle column ("Preparation") and then to the right column ("Ready"). When you move the item to the "Ready" column, the waiter is notified. Additionally, the item will also be updated in the client's tracker page simultaneously.
Mainboard > Topbar > View selector > Items
Note: 1. Tap on any item for more details. 2. Items with yellow background indicate that the client requested an option/extra/special for them.
Item refund
Any item can be refunded before the order is paid. The customer will receive a notification via a pop-up and a message.
Order palette > Tap the + icon > Order detailed page > item palette > Refund icon
This feature is disabled if the order is paid.
An admin password is required
Item "On-the-House"
Any item can be declared as "On The House" (OTH) and, therefore, fully refunded before the order is paid. The client will be notified by a popup and a message
Order palette > Tap the + icon > Order detailed page > item palette > Present icon